Learning Rust from Documentation!
Part I — Getting Started

I’ll be following Rust’s official documentation to learn the Rust. And it’s completely okay if you’re a beginner, I’m one too(in Rust), I’m writing this while reading and learning through the documentation. You can get the documentation here: The Rust Programming Language.
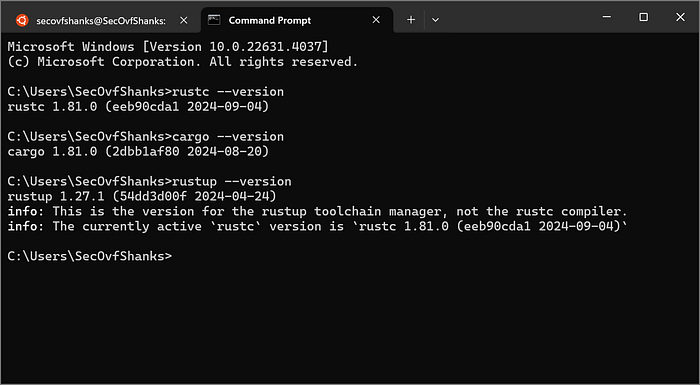
Checking if Rust Compiler and Cargo is Installed
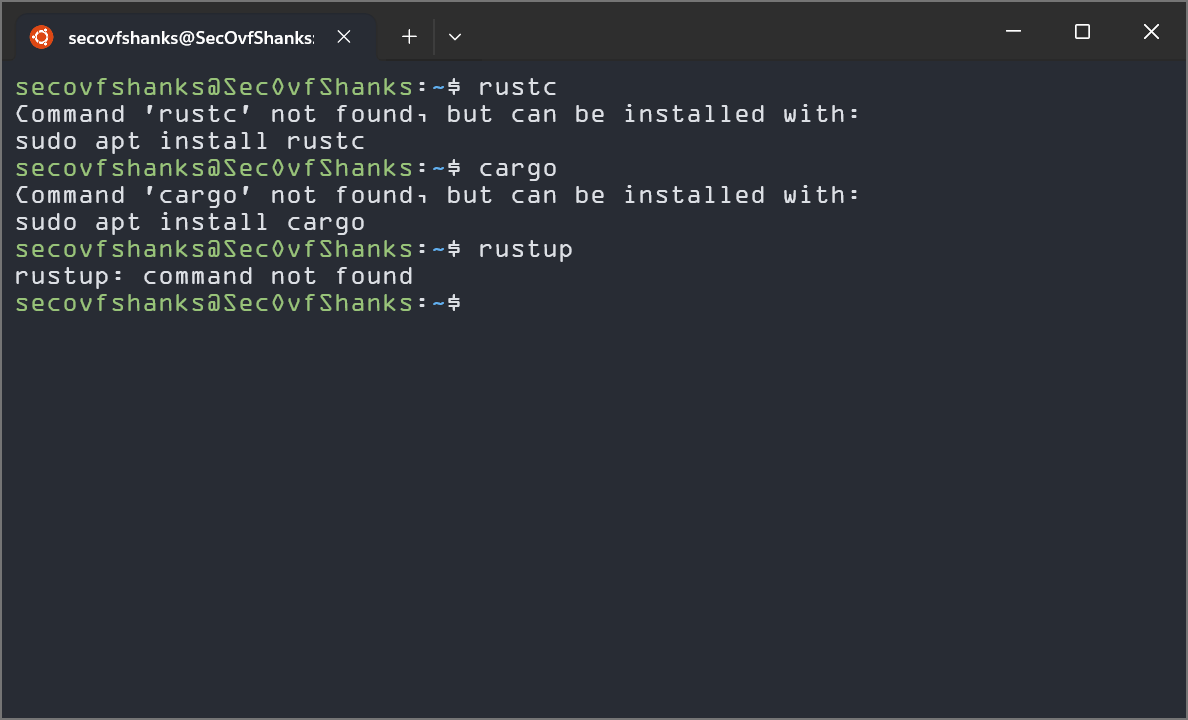
You can do the same on a Windows Command Prompt, if it throws an error, either the path is not included in the environment variables, or the compiler and package manager do not exist on the system you’re working on.
So, if you’re wondering what a Rust compiler is, technically it just is a program that takes your Rust code and makes it understandable for the OS you’re working on. And cargo, which is Rust’s package manager, like npm for nodeJS, Putting it mathematically, cargo:rust::npm:nodejs
I’m doing this on WSL (Windows Subsystem for Linux) so people on Linux can directly follow along. Ikik, I advocate for using Linux all the time because I’m in love with the OS (Kali Specifically), but to make tutorials so that I can do it on both Windows and on a Linux terminal, I’m using Windows.
Installation

See, going to the website, downloading the installer,
Installation (Linux)
The installation on Linux is fairly straightforward. Copy and paste a command (chain of commands to be precise), and boom, you’re done. Take a look.

Just press enter to follow along and If you want to customize the installation, press 2 and continue to installation.
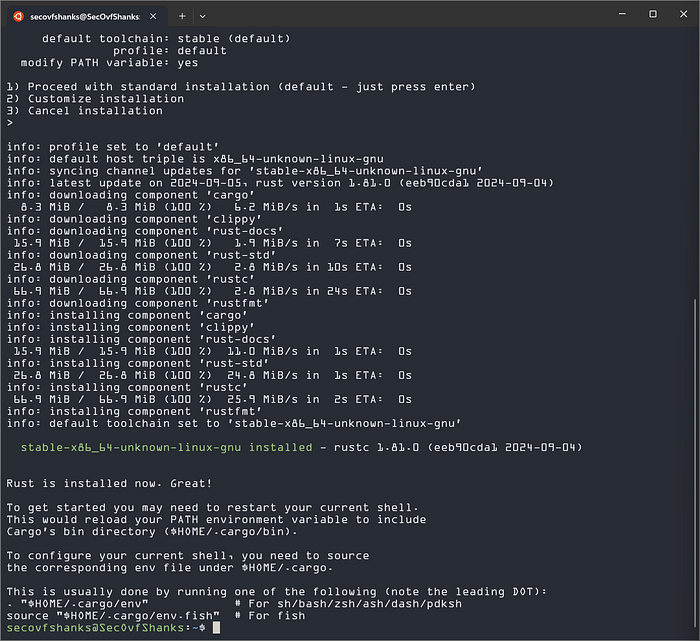
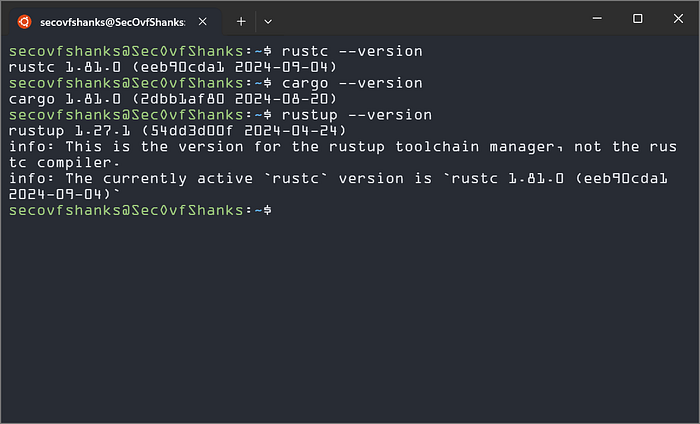
Boom, we’ve successfully installed the rust compiler and the package manager (and a few additional things that we don’t need to worry about for now).
Here’s how you can check.
Installation (Windows)
- Go to Install Rust — Rust Programming Language (rust-lang.org)
- Download rustup-init.exe 32-bit or 64-bit, According to your system.
- Run the installer
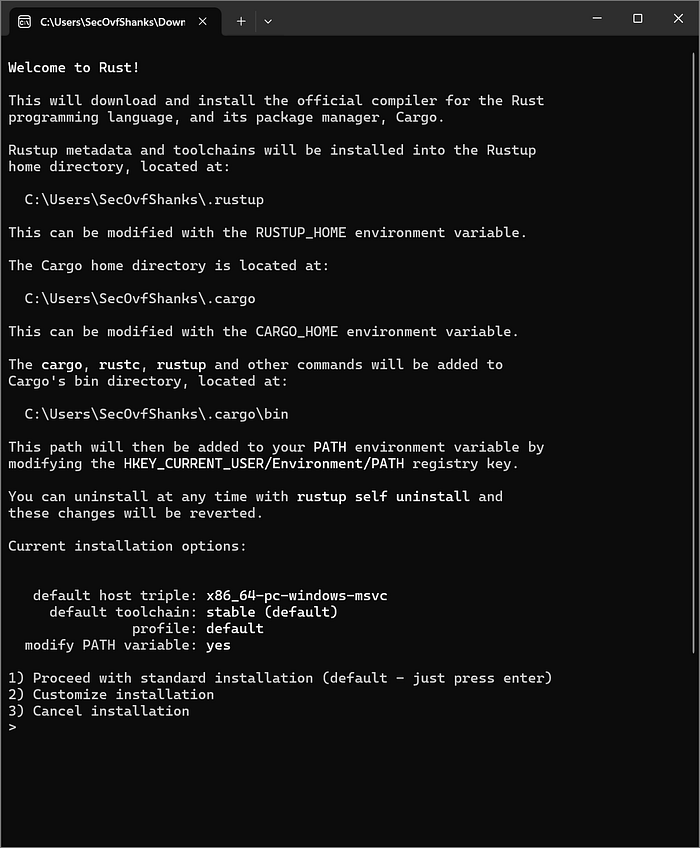
4. Press Enter and you’re done.
Let’s get started.
Now, you sure don’t want to get the home directory messy (filled up with executables). So, we’ll navigate to a new directory.
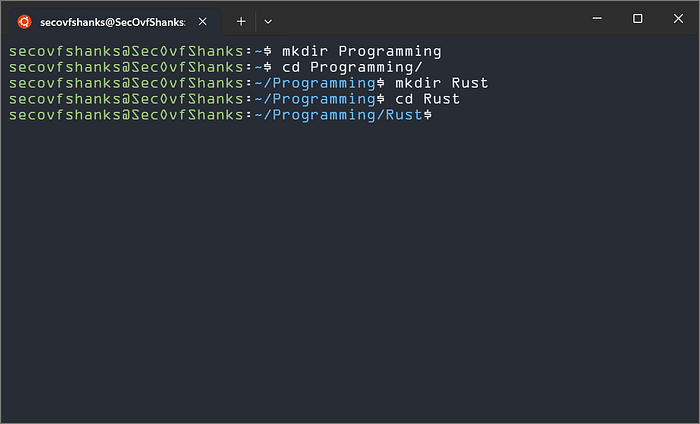
Here’s a tip (can call it a trick) for doing the same.
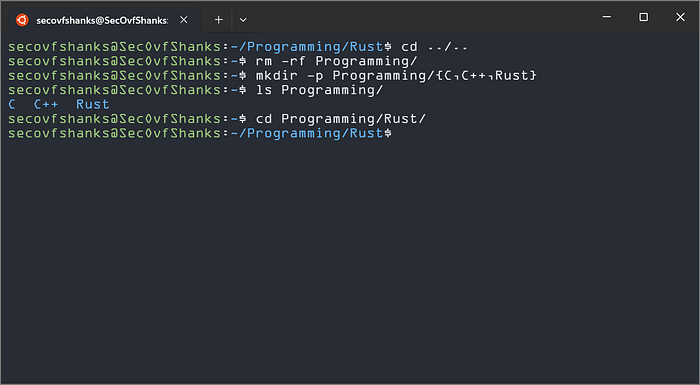
mkdir -p Programming/{C,C++,Rust}What this does is make a parent directory named Programming and 3 child directories (Made the C and C++ just for demonstration purposes) inside it named C, C++ and Rust.
Moving on. Let’s get to writing and compiling our first Rust program.
Writing and Compiling our first Rust Program.
The compiling steps are the same on both Windows and Linux. There’s a minor difference in executing the program.
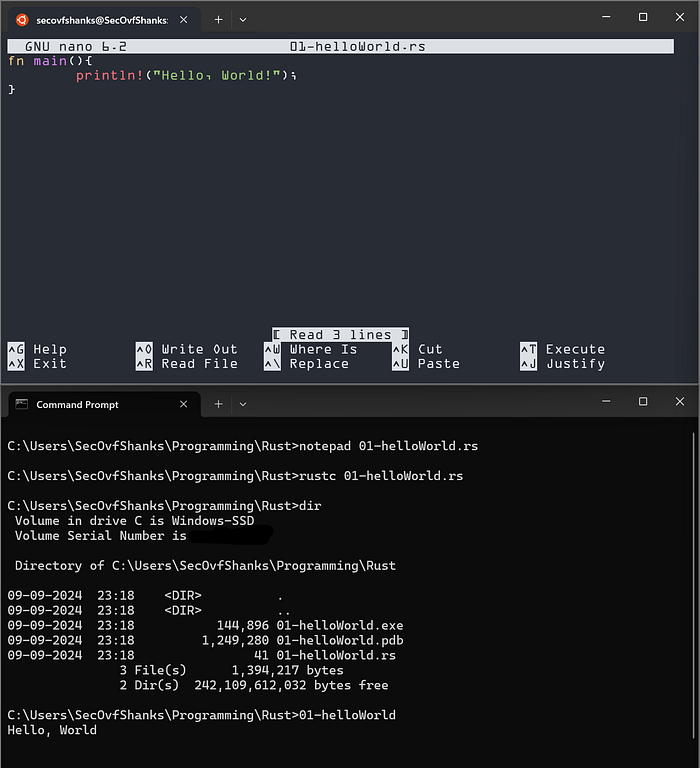
- Make a file named anything you want. I’m naming it 01-helloWorld.rs.
- TYPE the code into the file and save the file.
- Compile the program.
- Execute the program.
Linux Terminal:
nano 01-helloWorld.rs
rustc 01-helloWorld.rs
./01-helloWorld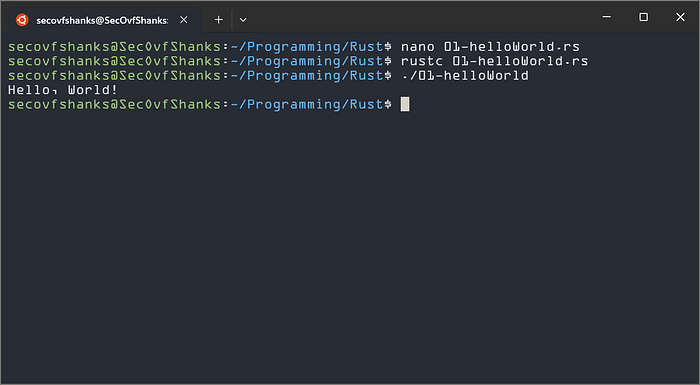
notepad 01-helloWorld.rs
rustc 01-helloWorld.rs
01-helloWorld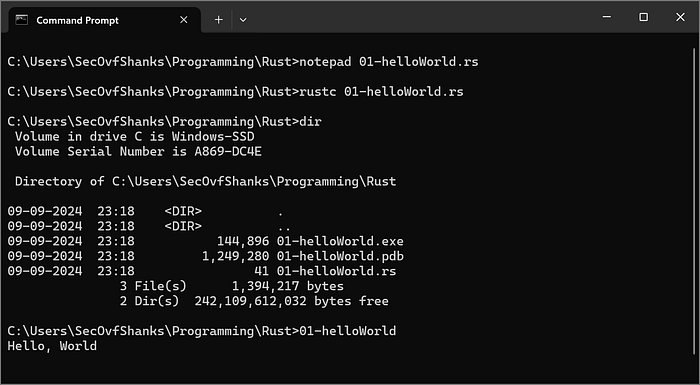
Congratulations! We’ve successfully written, compiled and run our first program in Rust.
Structure of a Rust Program
fn main(){

}
These lines are used to define a function, And the main function is a special one. It is always the first code that runs in every executable Rust program.
The function’s body is wrapped in {}. Like C, functions in Rust too require curly braces “{}” around all function bodies.
In our code, the body of the main function holds:
println!("Hello, World!");The above line is responsible for printing the phrase “Hello, World!” on the screen.
println! calls a Rust macro, not a function. (TBH, I have no idea what tf that means ATM, it’s mentioned that “We’ll discuss Rust macros in more detail in Chapter 19”, let’s see). Just know that using an ‘!’ means using a macro, and macros don’t always follow the same rules as functions.
The thing inside the parenthesis ‘()’ is an argument. We passed the string “Hello, World!” to the macro println!, and this string is printed to the terminal.
Like C, we end a statement with a semicolon (;), which indicates that the expression is over and we’re ready to begin a new one.
Introducing Cargo
Cargo is Rust’s package manager and is the build system. It is used for handling tasks like building our code, downloading the libraries your code depends upon, building those libraries (known as dependencies), etc.
The code we wrote earlier was a simple “Hello, World!” program that didn’t need any dependencies. Still, as you start working on large projects, you’ll find yourself incorporating the code made by others into yours to build amazing things. These are dependencies. Starting a project using cargo eases adding new dependencies and other things.
Enough introduction, let’s get to work!
Creating a Project with Cargo
To create a new project, use the command
cargo new project-name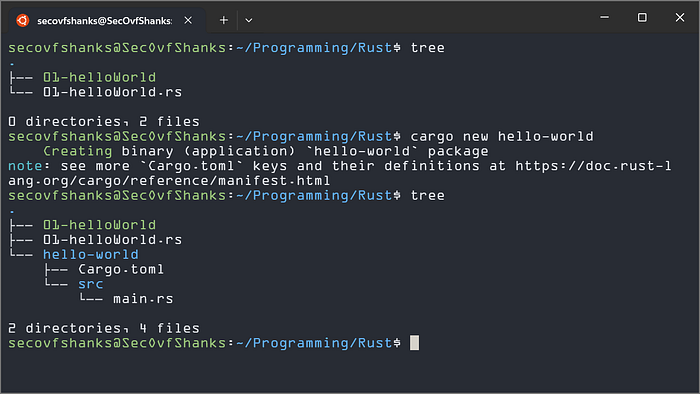
Here we can see the files before and after making a project using cargo. The cargo command creates a new directory named <project-name> and inside that sits a Cargo.toml file and a directory src with main.rs inside it.
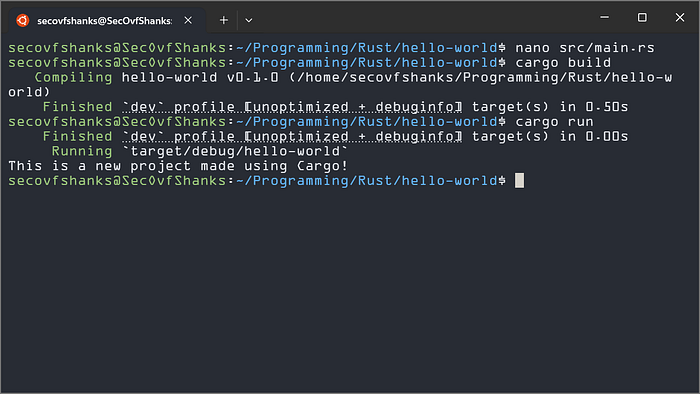
Inside that main.rs, we write our code. Let’s now edit that code and make it our own.
Building and Running the Project with Cargo
Now that we’re done making changes to the code (Make any changes, replace the string with anything you want just to know)
You can also use the command line argument ‘--quiet’ to omit the additional info being displayed.
cargo build --quiet
cargo run --quiet
Checking for errors
Another important sub-command cargo provides is the check. You can check if the project’s source code compiles without making an executable so it’s much faster than cargo build.
cargo checkBuilding for Release
When the project is completed and ready for release, what we can do is use cargo build --release to compile it with optimizations, what it does is take a bit longer to build the project but because of the optimizations applied, the code runs faster.
Wrapping up with the last section.
Working on Large Projects
When it comes to working on projects made by others, this is when the cargo comes in handy. It’s easy to let cargo coordinate the build process so that we don’t need to go through the extra work of manually installing the things needed to get started working.
This might look something like:
git clone github.com/nimishdudhe01/example-repository
cd example-repository
cargo build
As simple as that.
From the next blog, we’ll be working with the language to make more complex programs, starting with a guessing game.
Let me know If you liked the blog, You can reach me out on LinkedIn and here on Medium. Make sure to follow and like If it helped you.